
1. In any browser, go to https://www.wix.com/

2. Here, you can log in using your Butler email address. If you prefer, you may use an alternate Google address, or you can manually sign up using a valid email address. For the purposes of this tutorial, we will use our Butler email address.

3. You will then receive a pop-up, and it will ask you to log in with your Gmail account. For this example, choose your preferred email address.

4. Click "For myself, my business, or a friend." Then click "Continue."

5. Click "Blog," then click "Continue."

6. Decide what you will name your site, and enter the name of your site. Once selected, click "Continue."

7. This is for adding third-party applications, but for this project, it is not essential. Go to the bottom and click "skip," and then click "Continue to Dashboard."

8. When you reach this page, you can ignore connecting to a custom domain step. Scroll down and click on "Design your website."

1. Click "Get Started."

2. Here, you can add personal information such as names, addresses, phone numbers, and social media links. For the purposes of this project, you can click "Skip."

3. Then you will be taken to the theme page. You can choose from a number of pre-determined themes. There are many to choose from, so take some time and decide what overall theme you would like your site to look like. For the purposes of this tutorial, we will click "Minimalist." Click "Next."

4. We decided to click on one of the many themes presented. Once you pick one of the themes you like, click "Next."

5. Then you will come to the "Add pages to your site" page. Here are a few pages you can create to get started. For the purposes of this tutorial, we are just going to click the "About" page and click "Next."

6. From here, you can take a look at the site. Click "View Live Site" to see what the designed site looks like.
Now this is just the beginning! From here, you can better access what and how you want your site to look like!

7. From here, you can view the site. This site only has a home page, an about page, and a blog page. Take some time to go through the basic site and see what you like about the design and what you want to change. This site is completely customizable.
Here you can see the landing page. It has many different elements (many of which are not needed), like a subscription tab, an advertiser tab, etc.

8. Additionally, there are different pages for the site. If you click on the "Home" page, you will see the standard landing page for the website. This is the default page that will show up once you visit the site.

9. If you click on the "About" page, there is very standard "boilerplate" messaging that is added to the theme.

10. If you click on the "Blog" page, you will see that it says "Check Back Soon." This just means that there is not yet any content uploaded on the website.

11. If you click on the "Home" page, you will see the standard landing page for the website. This is the default page that will show up once you visit the site.

1. On your webpage, click "Settings."

2. Then click "Roles & Permissions."

3. You will get a pop-up window with a number of settings. Go to "Manage Roles." Then click "Admin (Co-Owner)."

4. Here you can see the permissions for the administrator of the site. You can view who has permission to edit the site.

5. You can see the type of privileges an editor has by clicking "Editor" in the drop-down button.

6. From here, you can invite your other classmates so they can edit the site as well! Click "Invite People" and enter the addresses of the group members, then click "Send Invite."

7. After clicking "Send Invite," you will be prompted with a box that states, "Let us know how you're connected." Here, you can click "A colleague at my business" or "Someone else." Then click "Done." You can always click "Skip" as well.

1. Click on the "Home" tab, and in the upper right corner, click "Edit Site."

2. You will be directed to the primary place where you can edit your site. From this page, you can choose to add elements, pages, images, and more. You can also edit the fonts and really anything else you can imagine! On the left pane is the different buttons for navigation.

3. The "Add Elements" tab allows you to add elements such as text, images, buttons, and more.

4. The "Add Section" tab allows you to choose from templates that allow for a section to be added to a particular page. You can also add a blank section for full customization.

5. The "Site page and Menu" tab is where you can navigate and add different pages for your site. You can also add blog pages as well.

Tip: See the "Create and Edit a New Page" page on how to set up and edit a new page using Wix.
6. The "Site Design" tab allows you to change the color, text, background, and page transitions for the theme of your site.

7. The "Site Design" tab allows you to customize your base colors and add accent colors.

8. The "Text theme" button allows you to change the text for the entire theme of the website by using different heading styles.

9. The "Page background" button allows you to edit the page background with different colors or images.

10. The "Page transitions" button allows you to choose how you want the transition between different pages to appear.

11. The "Wix App Market" is a library of third-party and community-supported design elements that can be found.

12. Under the "My Business" tab, you can find a variety of ways to publish to the site, including creating posts, managing blog pages, customizing pages, and more.

13. If you click "Create Post," then you will get a pop-up window where you can start typing.

14. The "My Business" tab also has a section titled "Wix Forms & Payments." This tab will not be of much use for the GHS projects.

15. The "Wix Site Search" allows for strengthening search results for your site.
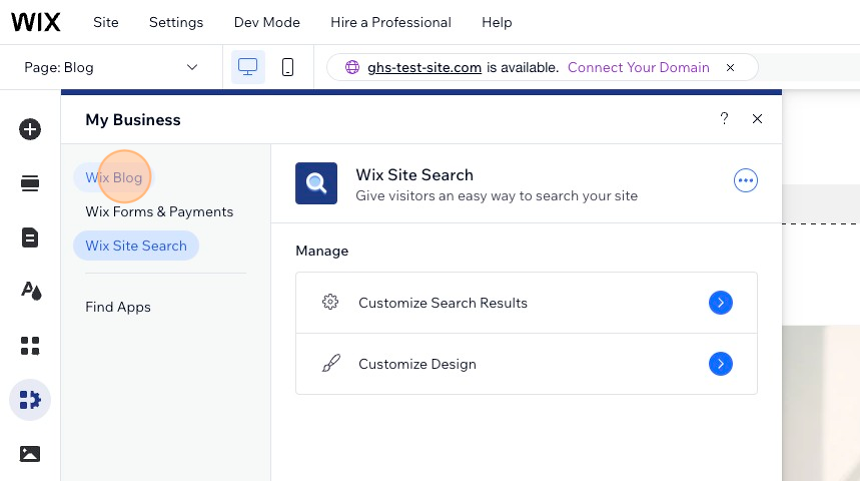
16. Under the "Media" tab, you can add and edit photos, videos, and audio, as well as link to social media sites. There is also a section where you can use free images and videos.

17. A Content Management System (CMS) is a user-friendly software application that manages digital content on a website, enabling easy website creation, launch, and updates without coding. However, this is not applicable to the GHS projects.

18. The "Marketing & SEO" tab is geared toward marketing the website.

1. The "Site page and Menu" tab is where you can navigate and add different pages for your site. You can also add blog pages as well.

2. Then click on what kind of page you want to set up. There are a variety of templates to choose from, but for the purposes of this tutorial, we are going to choose "General." From there, you will see more choices that match your theme.

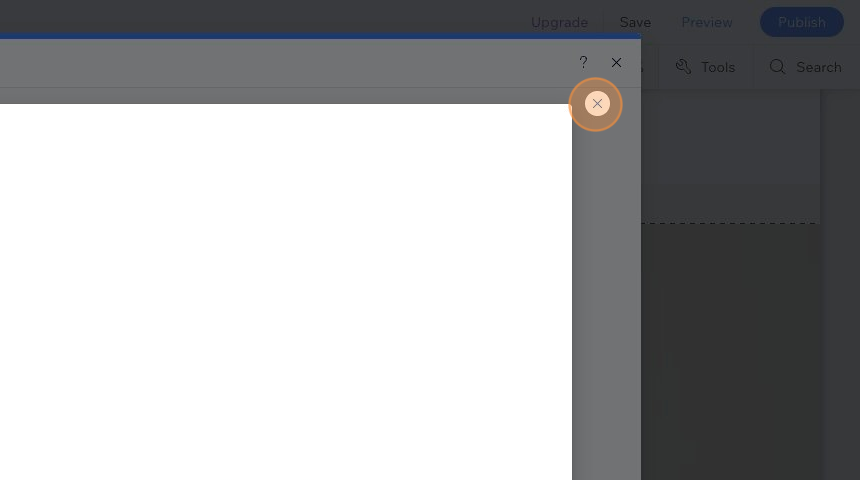
3. Click on one of the pages, and it will give you the choice to preview. To view the page, you can click "Preview."

4. If you like the preview of the page, then you can exit by clicking the "x" at the top right-hand corner of the screen.
5. Once you pick a design, click the "Add Page" button.

6. After you pick your page, give it a name. This name will be presented on the main site.

1. On the Site menu, you can delete, edit, and change the settings of the other pages already created in the template.

2. The "Site page and Menu" tab is where you can navigate and add different pages for your site. You can also add blog pages as well.

3. Also, under the "Site Menu" tab under the "Site Menu" section, you can change the settings of the different pages. If you click the six buttons on the left-hand side of the pages, you can change their location and hierarchy on the site.

4. If you click the ellipses, you will get a drop-down menu that allows for more settings. You can duplicate, copy, or set any page to be the main page. Additionally, you can access more settings by clicking "Settings," which will give you more settings to edit the page.

5. Here you can edit the page information, the layout, permissions, and more.

6. Additionally, you can hide a page that is still under construction so that nobody else can see it. An eye with a line through it next to the page means it is hidden on the published version of the site.

1. Navigate to https://www.wix.com/ and click on "My Sites."

2. When you get to the back end of the site, click on "Site & App," then click "Website," and then click "Edit Site."

3. By clicking the drop-down arrow, you can navigate between which pages to edit. For the purposes of this tutorial, we are going to edit the "General Test page."

4. Here, we are going to edit the text of the "Page Title." Click on the "Page Title," and it will become editable. For the purposes of this tutorial, we are going to type "GHS 210 Test Page." Then, we can add some text to the text box below the title page. We will just add some general language taken from the Digital Commons site. Like with the title, click on the textbox to enter the text.

5. Once the text is added, you can customize how you want the text to look. This includes altering the theme-predetermined text box sizes. You can also adjust the heading styles, fonts, font sizes, bold, italics, font color, and more.

6. Additionally, you can add different effects to the fonts. You can also edit the character and line spacing, as well as options for accessibility.

1. Here, you can easily add an image to a section. For the purpose of this tutorial, we have deleted a section with text and decided to add an image.

2. Right-click the text, and you have more ways to edit the columns.

3. If you want to add an image to a section of the site, you can use the side tabs to navigate to the "Media" tab and add an image. You can add an image from your computer or from social media sites and Google Drive.
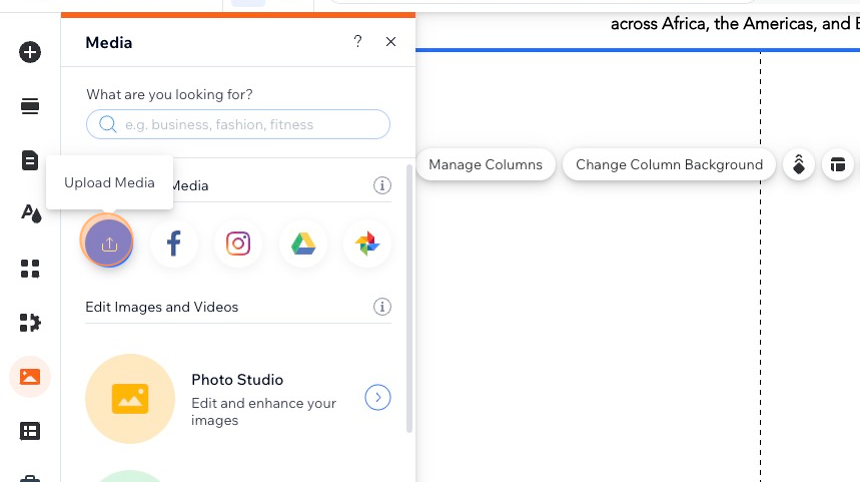
4. When you get to the "Upload Media" pop-up, you can navigate to the image that you want to upload.

5. Once you have selected your image, click "Upload Media" and click "Add to Page."
Click "Add to Page."

1. The image is now on your site! From here, you can make edits to the image. You can click on the image, and you will be prompted with a few widgets like "Change Image" and "Edit Image," along with a few other tools. To edit your image, click "Edit Image."

2. A page will pop up called "Photo Studio." Here you can crop and resize the image, enhance it, adjust the brightness and contrast, add filters, add text, and more.

3. "Adjust" allows you to add highlights, shadows, color saturation, apply filters, and more to your image. For this image, we will click "Adjust" the contrast.

4. There is also an option for filters for your chosen image.

5. "Cut Out" allows you to remove the background of any image with dominant faces or for segmenting objects.

6. You can add "Text" to the image as well.

7. "Overlay" allows you to add effects to your image. Select shadows, reflections, fogs, flares, and more. For the purpose of this tutorial, we will add an overlay to the image. As you click on the overlay, you can preview what the image looks like. Click an overlay and click "Save."

8. Once you click "Save," you will see the altered image on the site.

9. After editing your image and adding your text, you can preview what the site looks like. Scroll to the top-right corner and click "Save."

10. You will receive a pop-up window. Here, you are asked to do a few things involving your settings. Here, you can change your domain name. For example, my domain name is "ghs-test-210." You can click the checkmark after changing the domain name.

11. You can choose not to see this message every time you save. Just check the box next to "Don't show this again" in the bottom left corner.

12. You can also choose to publish your site. However, in the first stages, you don't have to publish the site. Once you are happy with these settings, you can click "Done."

13. Click the "Preview" button at the top right corner to look at the site.

14. Click "GHS 210 Test Page."

15. During the preview, we notice that the text box is askew. No problem! We can just fix that issue.

16. Click "Back to Editor" to edit the textbox on the site.

17. Click on the text. From here, you can change the size of the textbox, the placement of the text, and more.

18. For this box, we are going to resize the box to make it align with the site's grids.
Click here.

19. Now that the textbox has been aligned, we can click "Save" and "Preview."

20. After previewing it again, the textbox would look better with a smaller font. Click "Back to Editor" and change the size of the font. Highlight the text and right-click to change the text.

Library Hours
Study Rooms
My Library Account
Library Website

